
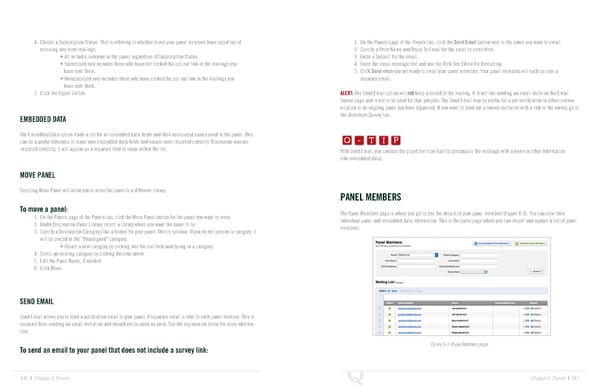
4. Choose a Subscription Status. This is referring to whether or not your panel members have opted out of 1. On the Panels page of the Panels tab, click the Send Email button next to the panel you want to email. receiving any more mailings. 2. Specify a From Name and Reply-To Email for the email to come from. • All includes everyone in the panel, regardless of Subscription Status. 3. Enter a Subject for the email. • Subscribed only includes those who have not clicked the opt-out link in the mailings you 4. Enter the email message text and use the Rich Text Editor for formatting. have sent them. 5. Click Send when you are ready to email your panel members. Your panel members will each be sent a • Unsubscribed only includes those who have clicked the opt-out link in the mailings you separate email. have sent them. 5. Click the Export button. ALERT: The Send Email option will not keep a record of the mailing. It is not like sending an email invite on the Email Survey page and is not to be used for that purpose. The Send Email may be useful for a pre-notification or other commu- nication to an ongoing panel you have organized. If you want to send out a survey invitation with a link to the survey, go to Q-TIP -TIP EMBEDDED DATA the Distribute Survey tab. Q - T I P The Embedded Data option loads a list for all embedded data fields and their associated values used in the panel. This Q - T I P can be a useful reference to make sure embedded data fields and values were imported correctly. If someone was not imported correctly, it will appear as a separate field or value within the list. With Send Email, you can use the piped text icon ({a}) to personalize the message with a name or other information - T I P (like embedded data). MOVE PANEL Selecting Move Panel will allow you to move the panel to a different library. PANEL MEMBERS To move a panel: The Panel Members page is where you get to see the details of your panel members (Figure 8-3). You can view their 1. On the Panels page of the Panels tab, click the Move Panel button for the panel you want to move. individual panel and embedded data information. This is the same page where you can import and update a list of panel 2. Under Destination Panel Library, select a library where you want the panel to be. members. 3. Specify a Destination Category (like a folder) for your panel. This is optional. If you do not provide a category, it will be placed in the “Unassigned” category. • Create a new category by clicking into the text field and typing in a category. 4. Select an existing category by clicking the blue arrow. 5. Edit the Panel Name, if needed. 6. Click Move. SEND EMAIL Send Email allows you to send a notification email to your panel. A separate email is sent to each panel member. This is separate from sending an email invitation and should not be used as such. See the explanation below for more informa- tion. To send an email to your panel that does not include a survey link: Figure 8-3 Panel Members page. 146 | Chapter 8: Panels Chapter 8: Panels | 147
 The Complete Research Suite Page 73 Page 75