
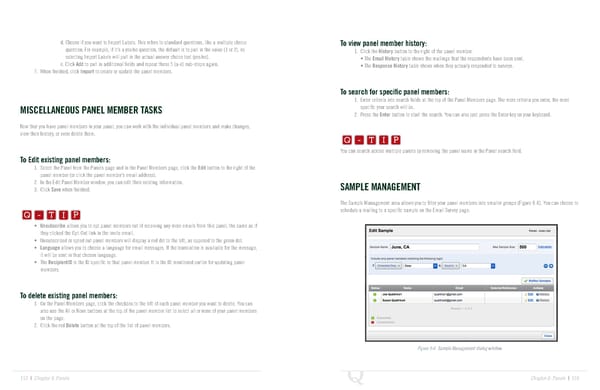
d. Choose if you want to Import Labels. This refers to standard questions, like a multiple choice To view panel member history: question. For example, if it’s a yes/no question, the default is to pull in the value (1 or 2), so 1. Click the History button to the right of the panel member. selecting Import Labels will pull in the actual answer choice text (yes/no). • The Email History table shows the mailings that the respondents have been sent. e. Click Add to pull in additional fields and repeat these 5 (a-e) sub-steps again. • The Response History table shows when they actually responded to surveys. 7. When finished, click Import to create or update the panel members. To search for specific panel members: 1. Enter criteria into search fields at the top of the Panel Members page. The more criteria you enter, the more specific your search will be. MISCELLANEOUS PANEL MEMBER TASKS Q-TIP -TIP 2. Press the Enter button to start the search. You can also just press the Enter key on your keyboard. Now that you have panel members in your panel, you can work with the individual panel members and make changes, Q - T I P view their history, or even delete them. Q - T I P You can search across multiple panels by removing the panel name in the Panel search field. To Edit existing panel members: - T I P 1. Select the Panel from the Panels page and in the Panel Members page, click the Edit button to the right of the panel member (or click the panel member’s email address). 2. In the Edit Panel Member window, you can edit their existing information. Q-TIP -TIP SAMPLE MANAGEMENT 3. Click Save when finished. Q - T I P The Sample Management area allows you to filter your panel members into smaller groups (Figure 8-6). You can choose to Q - T I P schedule a mailing to a specific sample on the Email Survey page. • Unsubscribe allows you to opt panel members out of receiving any more emails from this panel, the same as if - T I P they clicked the Opt-Out link in the invite email. • Unsubscribed or opted out panel members will display a red dot to the left, as opposed to the green dot. • Language allows you to choose a language for email messages. If the translation is available for the message, it will be sent in that chosen language. • The RecipientID is the ID specific to that panel member. It is the ID mentioned earlier for updating panel members. To delete existing panel members: 1. On the Panel Members page, click the checkbox to the left of each panel member you want to delete. You can also use the All or None buttons at the top of the panel member list to select all or none of your panel members on the page. 2. Click the red Delete button at the top of the list of panel members. Figure 8-6 Sample Management dialog window. 152 | Chapter 8: Panels Chapter 8: Panels | 153
 The Complete Research Suite Page 76 Page 78