
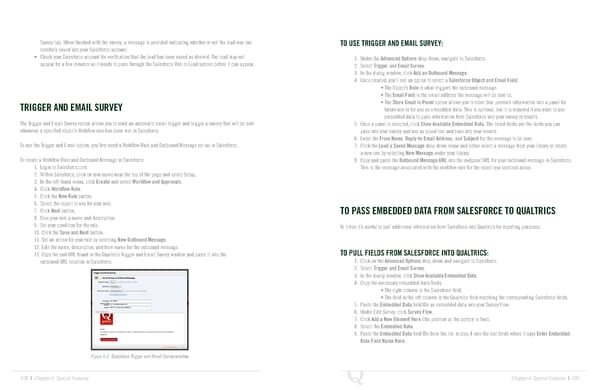
Survey tab. When finished with the survey, a message is provided indicating whether or not the lead was suc TO USE TRIGGER AND EMAIL SURVEY: cessfully saved into your Salesforce account. • Check your Salesforce account for verification that the lead has been saved as desired. The lead may not 1. Under the Advanced Options drop-down, navigate to Salesforce. appear for a few minutes as it needs to pass through the Salesforce Web to Lead system before it can appear. 2. Select Trigger and Email Survey. 3. In the dialog window, click Add an Outbound Message. 4. Once created, you’ll see an option to select a Salesforce Object and Email Field. • The Object’s Rule is what triggers the outbound message. • The Email Field is the email address the message will be sent to. TRIGGER AND EMAIL SURVEY • The Store Email in Panel option allows you to store that person’s information into a panel for future use or for use as embedded data. This is optional, but it is required if you want to use embedded data to pass information from Salesforce into your survey or results. The Trigger and Email Survey option allows you to send an automatic email trigger and trigger a survey that will be sent 5. Once a panel is selected, click Show Available Embedded Data. The listed fields are the fields you can whenever a specified object’s Workflow rule has been met in Salesforce. pass into your survey and use as piped text and save into your results. 6. Enter the From Name, Reply-to Email Address, and Subject for the message to be sent. To use the Trigger and Email option, you first need a Workflow Rule and Outbound Message set up in Salesforce. 7. Click the Load a Saved Message drop-down menu and either select a message from your library or create a new one by selecting New Message under your library. To create a Workflow Rule and Outbound Message in Salesforce: 8. Copy and paste the Outbound Message URL into the endpoint URL for your outbound message in Salesforce. 1. Login to Salesforce.com. This is the message associated with the workflow rule for the object you selected above. 2. Within Salesforce, click on your name near the top of the page and select Setup. 3. In the left-hand menu, click Create and select Workflow and Approvals. 4. Click Workflow Rule. 5. Click the New Rule button. 6. Select the object to use for your rule. 7. Click Next button. TO PASS EMBEDDED DATA FROM SALESFORCE TO QUALTRICS 8. Give your rule a name and description. 9. Set your condition for the rule. At times it’s useful to pull additional information from Salesforce into Qualtrics for reporting purposes. 10. Click the Save and Next button. 11. Set an action for your rule by selecting New Outbound Message. 12. Edit the name, description, and from name for the outbound message. TO PULL FIELDS FROM SALESFORCE INTO QUALTRICS: 13. Copy the end URL found in the Qualtrics Trigger and Email Survey window and paste it into the outbound URL location in Salesforce. 1. Click on the Advanced Options drop-down and navigate to Salesforce. 2. Select Trigger and Email Survey. 3. In the dialog window, click Show Available Embedded Data. 4. Copy the necessary embedded data fields. • The right column is the Salesforce field. • The field in the left column is the Qualtrics field matching the corresponding Salesforce fields. 5. Paste the Embedded Data field IDs as embedded data into your Survey Flow: 6. Under Edit Survey, click Survey Flow. 7. Click Add a New Element Here (the position at the bottom is fine). 8. Select the Embedded Data. 9. Paste the Embedded Data field IDs from the list in step 4 into the text fields where it says Enter Embedded Data Field Name Here. Figure 6-5 Salesforce Trigger and Email Survey window. 108 | Chapter 6: Special Features Chapter 6: Special Features | 109
 The Complete Research Suite Page 54 Page 56